ข่าว: ข่าวประกาศ

  • 24 เมษายน 2024, 20:53:58

เข้าสู่ระบบด้วยชื่อผู้ใช้ รหัสผ่าน และระยะเวลาในเซสชั่น

แสดงกระทู้

This section allows you to view all posts made by this member. Note that you can only see posts made in areas you currently have access to.


Messages - admin

หน้า: 1 [2] 3 4 ... 115
16
สินค้าและบริการ / Cold Front 32" All In One
« เมื่อ: 31 สิงหาคม 2016, 04:28:54 »

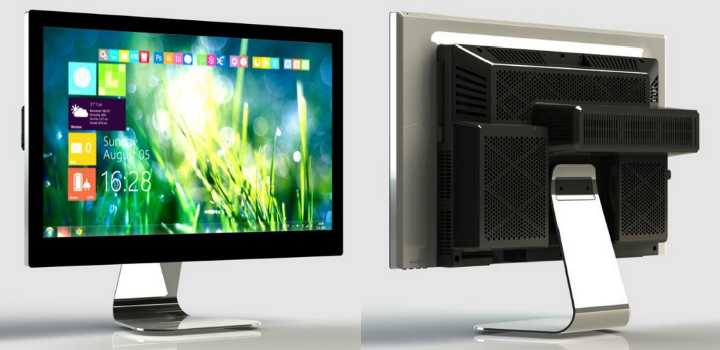
วันนี้พามาชม สินค้า All in One อีกตัว เป็นรุ่น Gen 2 ปรับปรุงพัฒนาแก้ไขมาจากรุ่นแรก โดยมีชื่อเรียกว่า Cold Front


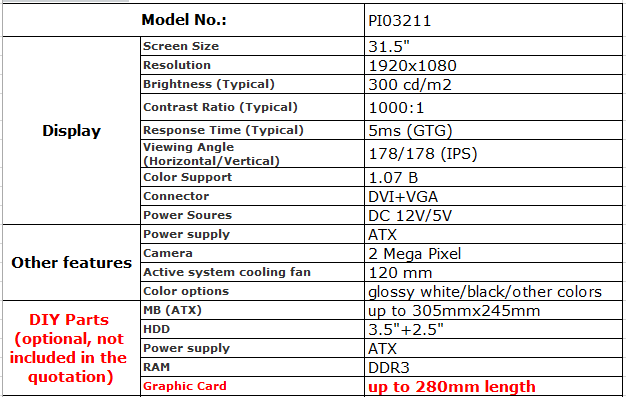
มาดูสเปคกันก่อน


ตัวจอจะเป็น IPS รองรับสี 1.07 พันล้านสี  รองรับ M/B ใหญ่ถึง ATX และมีพัดลมระบายความร้อนขนาด 120mm มาด้วย

มี webcam ขนาด 2MP มาให้ รองรับ HDD 3.5 1 ช่อง และ 2.5 1 ช่อง  VGA Card ยาวสุดได้ 28 cm แบบ DVI

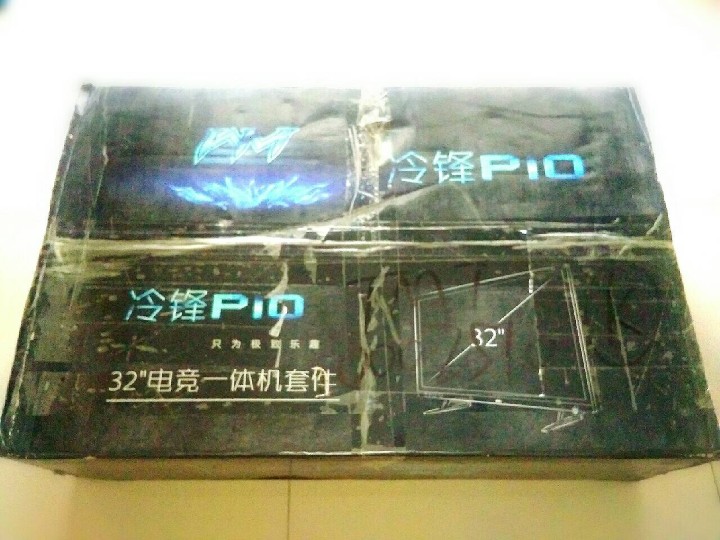
ก่อนทำการแกะกล่อง ก็ทำการวัดขนาดของกล่อง และชั่งน้ำหนักก่อน เพื่อใช้สำหรับคำนวณค่าขนส่ง


ขนาดของกล่อง 79x52x23cm  น้ำหนักประมาณ 14 กิโลกรัม  หลังจากนั้นก็ทำการแกะกล่อง


เปิดมาก็จะเจอขาตั้งจอ  ถุงใส่น๊อตสำหรับประกอบ  และสาย cable tie สำหรับรัดเก็บสายให้เป็นระเบียบ

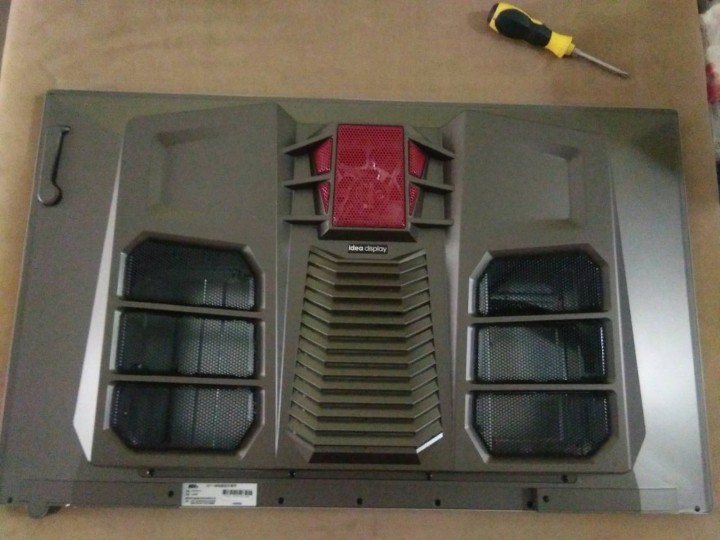
จอจะมีโฟมขนาดใหญ่ กันกระแทก แพคมาอย่างดี   ในรูปตัวอย่างจะเป็นสี gun-color หรือประมาณน้ำตาล-แดง


ในการประกอบ จำเป็นจะต้องวางจอบนพื้นที่นุ่มและสะอาด กันการเกิดรอยกระแทก หรือรอยขีดข่วนบนหน้าจอ


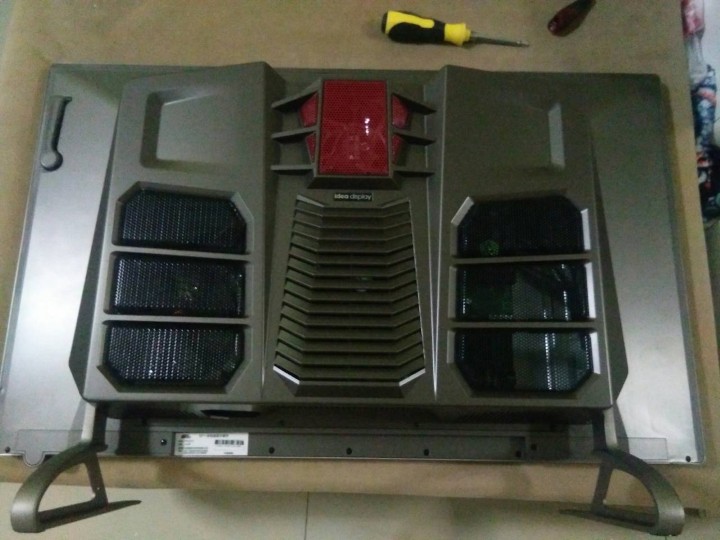
ขันน๊อตด้านบน 2 ตัว และด้านล่าง 4 ตัว แล้วค่อยๆถอดฝาครอบออก อย่าให้เดือยหรือตัวล๊อคมันหัก หรือแตก


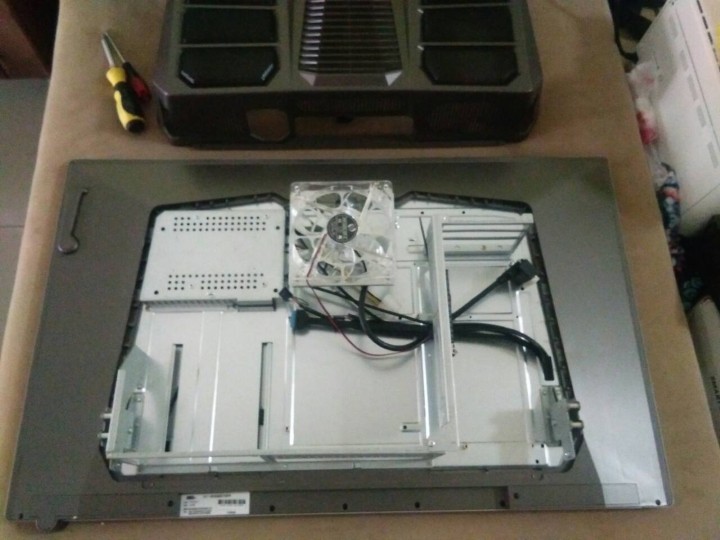
ด้านในก็จะโล่งๆ มีพัดลมขนาด 120mm สามารถถอดออกได้ ระหว่างประกอบ


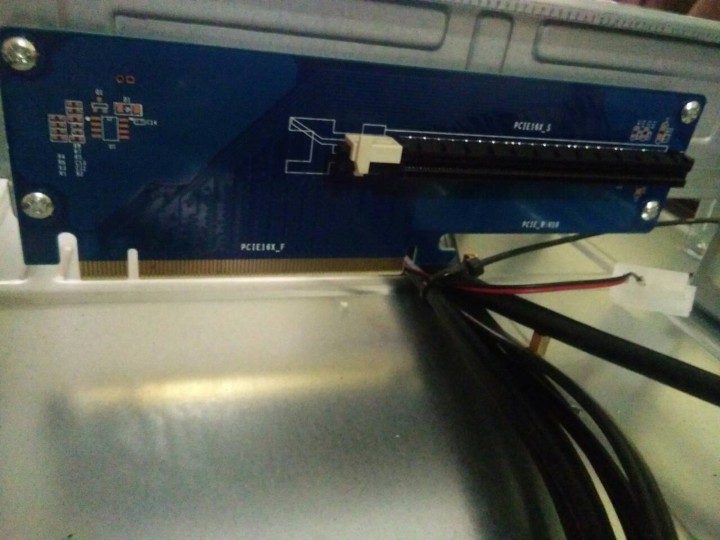
อุปกรณ์สำคัญอีกตัวของรุ่นนี้คือ ตัวแปลง Slot การ์ดจอ ที่ปรับให้การ์ดจอวางในแนวนอน ก็สามารถถอดออกมาก่อนได้

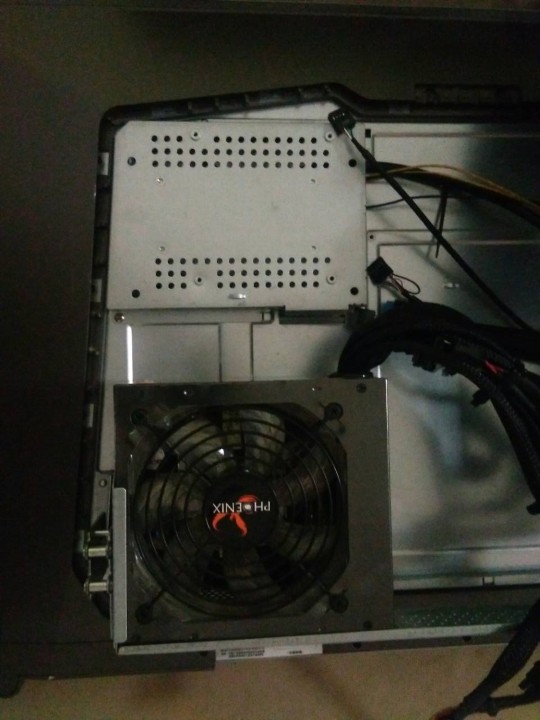
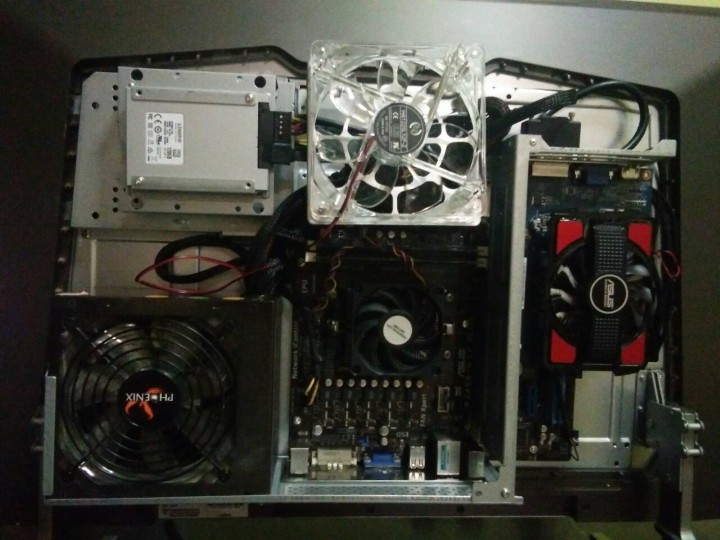
ต่อไปก็ทำการประกอบ Power Supply และ Mainboard ลงไป  สังเกตุว่า Power Supply ยังมีที่ว่างเหลืออยู่

สามารถใช้ Power Supply ขนาดยาวได้มากขึ้น ถึง 17cm


และ Mainboard ก็รองรับถึงขนาด ATX


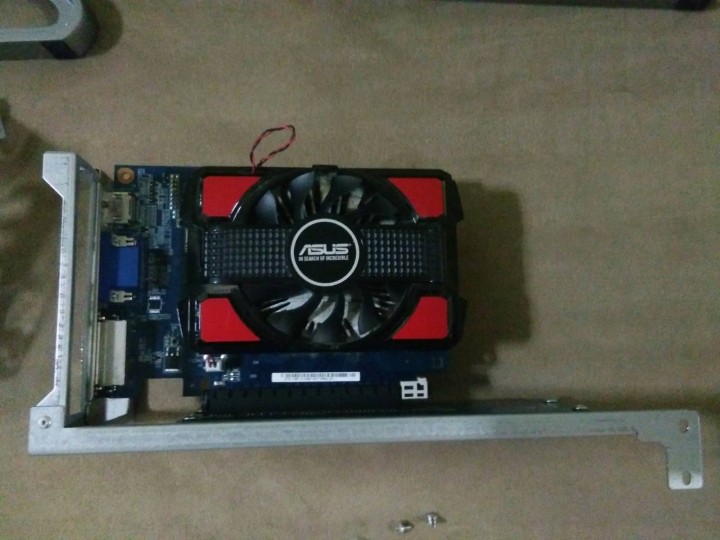
เสร็จแล้วก็ทำการประกอบ Slot การ์ดจอ เข้ากับการ์ดจอให้เรียบร้อย


หลังจากนั้นก็ทำการประกอบ สายสัญญาณต่าง ๆ  Power Switch/Power LED/Reset/HDD LED

ต่อสายไฟ ให้กับจอภาพ และต่อ Power เข้า Mainbord ต่อ HDD สุดท้ายค่อยใส่การ์ดจอ แล้วต่อสาย DVI

ติดพัดลม ต่อสายไฟให้พัดลม ก็เป็นอันเรียบร้อย


เสร็จแล้วก็ทำการปิดฝาครอบ ขันน๊อตให้เรียบร้อย แล้วก็ติดขาจอ ก็เป็นอันเสร็จเรียบร้อย


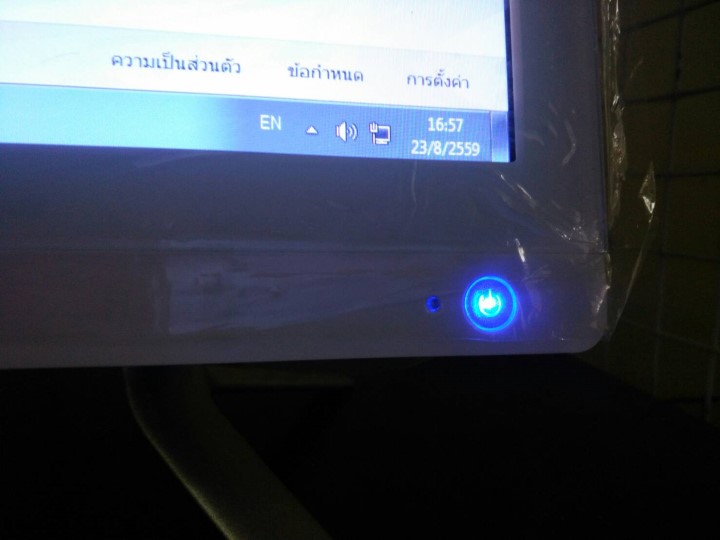
เปิดเครื่องได้  ปุ่มจะมีไฟสว่างเวลาเปิดเครื่อง   สังเกตุ รุ่นนี้จะมีไฟแสดงสถานะของ HDD ด้วย


จริงๆมันเหมาะสำหรับใช้เล่นเกมส์นะครับ แต่คนทดสอบเล่นเกมส์ไม่เป็น เลยเปิดการ์ตูนแทน


ด้านหน้าของจอ ก็จะมีช่องเสียบ หูฟัง   ไมค์  USB2.0  และ USB3.0 ตามรูป


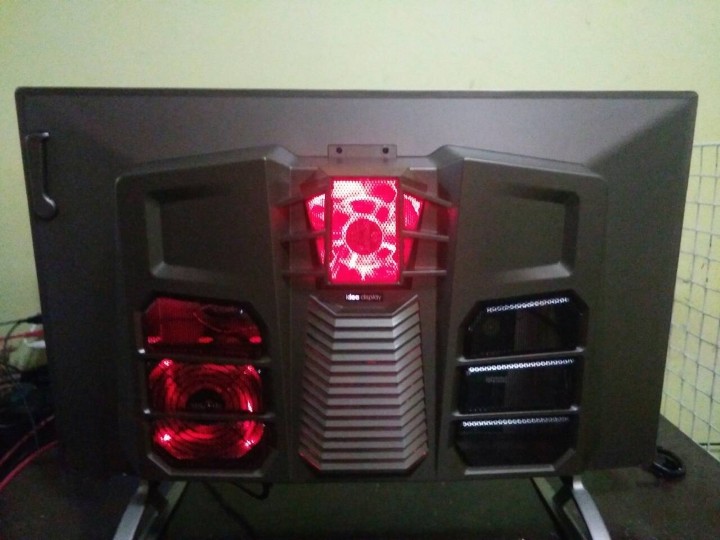
รุ่นนี้มี webcam มาให้ด้วยด้านหน้า 2MP  ด้านหลังก็จะมีไฟสีของพัดลม  ตัวนี้ก็จะเป็นสีแดง


สวยงามตามท้องเรื่อง


17
สินค้าและบริการ / Idea Display 27" All In One
« เมื่อ: 24 สิงหาคม 2016, 03:29:38 »


วันนี้พามาชม สินค้าตัวใหม่


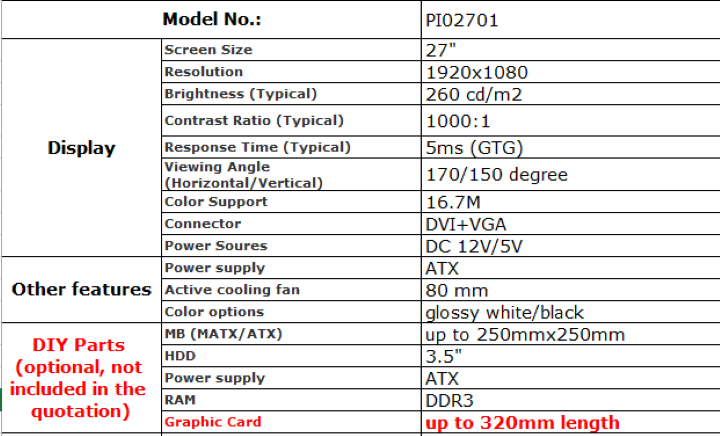
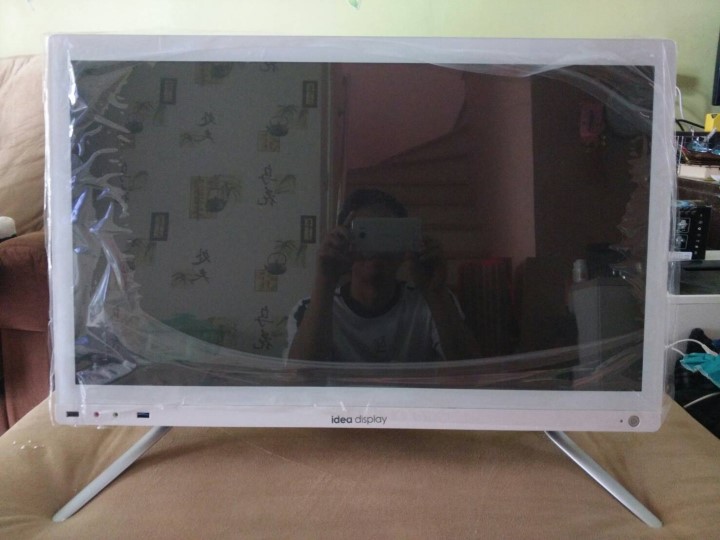
เป็น All In One ยี่ห้อ Idea Display แบบ DIY ชุด Barebone จอภาพขนาด 27"

ซึ่งมีรายละเอียดสเปคดังนี้


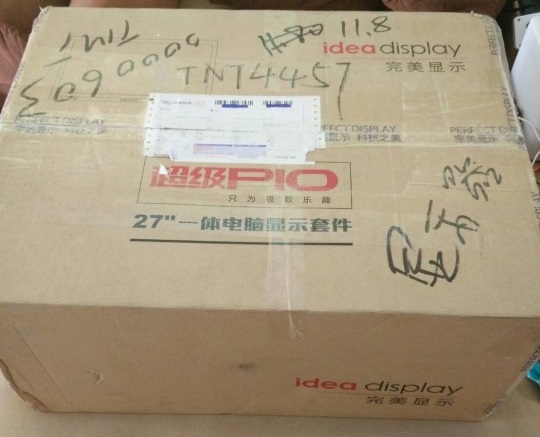
เริ่มต้น ก่อนแกะกล่อง ก็วัดขนาดกล่อง พร้อมชั่งน้ำหนัก เอาไว้สำหรับคำนวณค่าส่ง

กล่องมีขนาด  69 x 54 x 32cm  มีน้ำหนักประมาณ 12kg

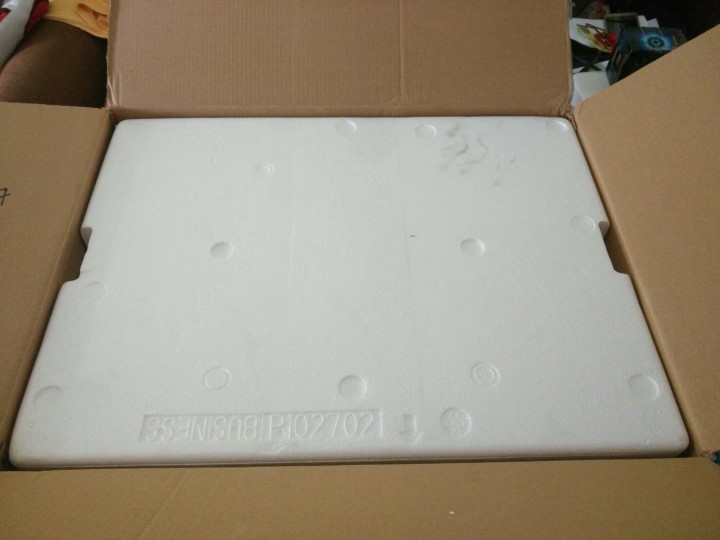
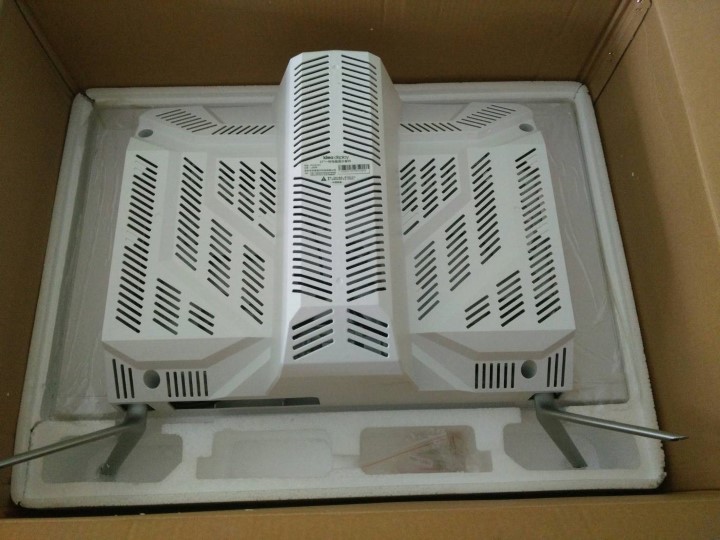
เมื่อแกะออกมาแล้ว ตัวจอมีการแพ็คมาเป็นอย่างดี ใช้โฟมขนาดใหญ่สองชิ้นประกอบหน้าหลัง


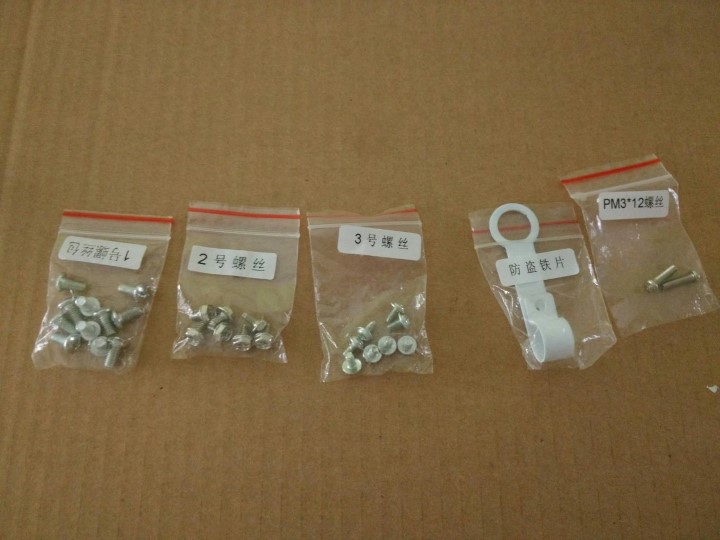
มั่นใจได้ในความแข็งแรง  ในกล่องก็จะมีตัวจอ และก็มีน๊อตสำหรับประกอบมา 1 ถุง


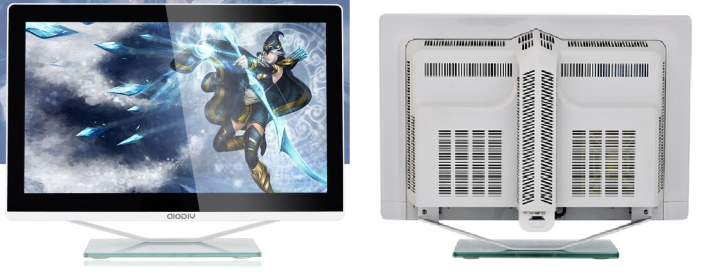
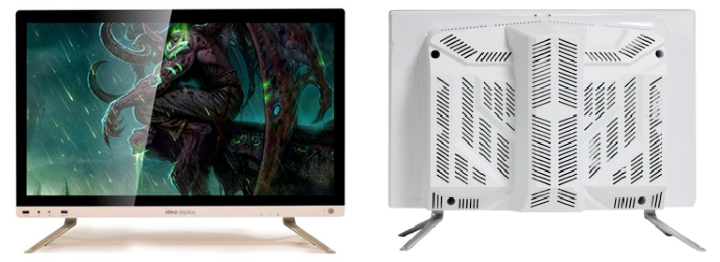
หน้าตาของจอ  ตัวในรูปจะเป็นขอบจอสีขาว นะครับ (รุ่นนี้จะมี ขอบจอ 2 สี  ขอบจอสีขาว / ขอบจอสีดำ)


ด้านหน้าของจอ  ด้านล่างก็จะมี USB2.0 ช่องต่อไมค์  ช่องต่อหูฟัง  USB3.0


โล้โก้ idea display (สามารถเปลี่ยนได้ โดยสั่งซื้อขั้นต่ำ 50 ตัว)


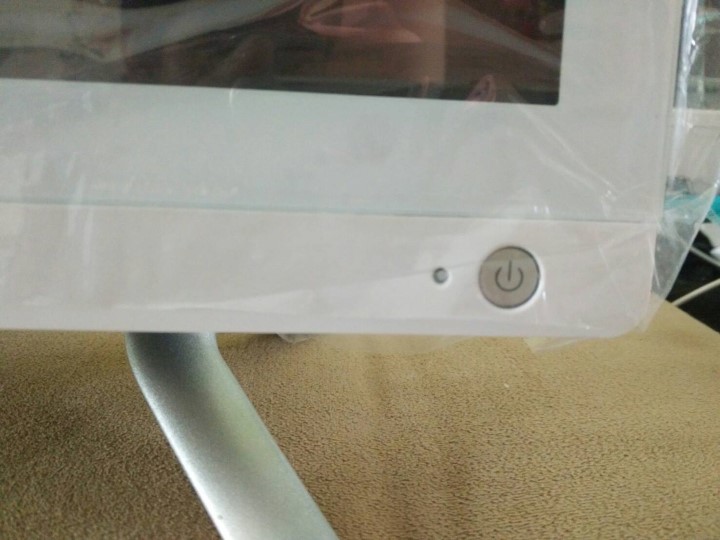
ด้านขวาก็จะเป็นปุ่ม Power และปุ่ม reset


ด้านหลังก็จะมีที่แขวนหูฟัง สามารถซ่อนเก็บได้


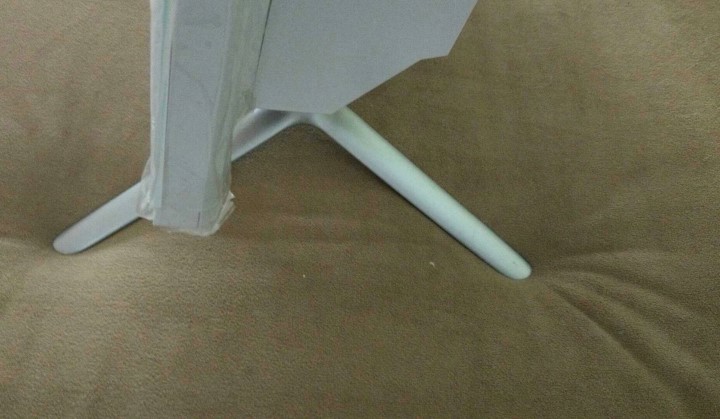
ขาของตัวจอ จะไม่มีรูสำหรับยึดน๊อตแล้วนะครับ ทางโรงงานได้เอาออกแล้ว เนื่องจากไม่ได้ใช้งาน


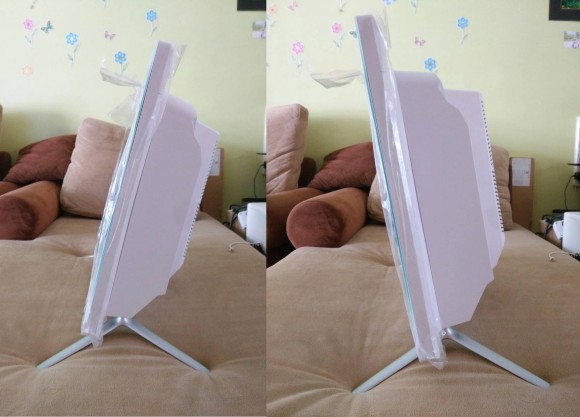
จอสามารถก้มเงยได้ ประมาณ 15 องศา


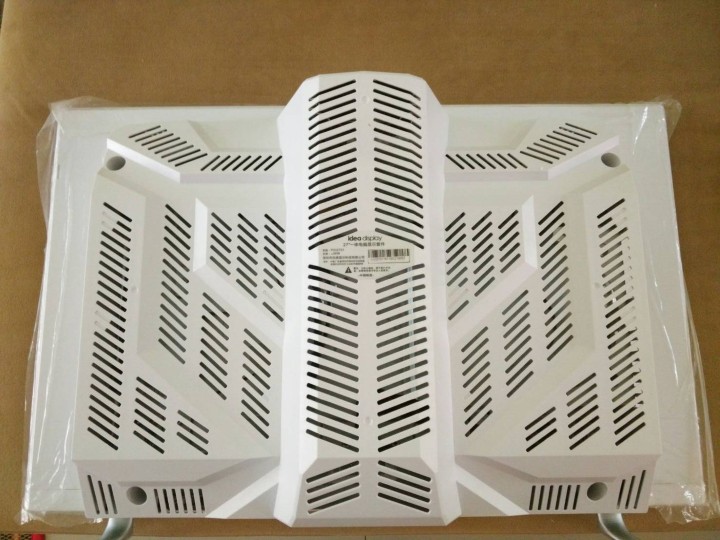
ต่อไปก็ทำการเปิดฝา โดยขันน๊อต 4 มุมด้านหลัง ก็สามารถเปิดฝาหลังออกมาได้


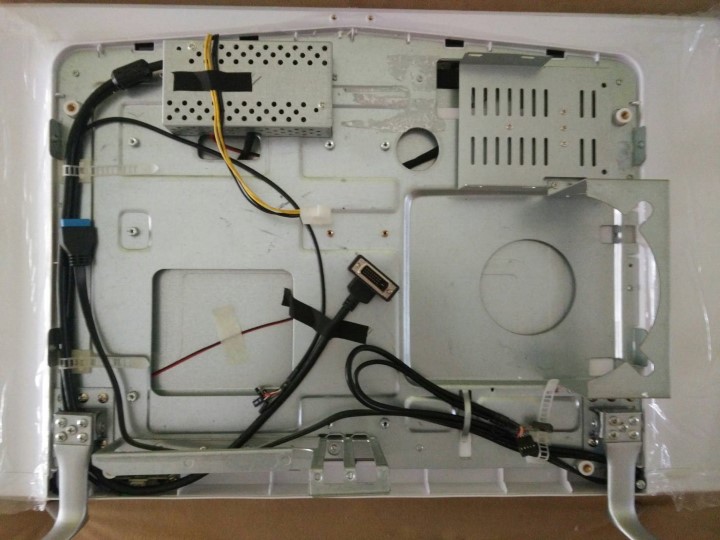
ก็จะมีสายสำคัญ ๆ ต่าง ๆ ในการประกอบตัวจอ  ได้แก่

- สาย power สำหรับจอภาพ เป็น molex แบบ 4 pin ต่อเข้ากับ power supply โดยตรง (จอภาพใช้ไฟประมาณ 36W)
- สายสัญญาณภาพของตัวจอ เป็นแบบ DVI
- สายที่ต่อเชื่อมบน M/B ได้แก่  สาย Power Switch, Power LED, Reset
- สาย USB 2.0 สำหรับเชื่อมต่อบน M/B
- สาย USB 3.0 สำหรับเชื่อมต่อบน M/B
- สาย Audio สำหรับเชื่อมต่อบน M/B
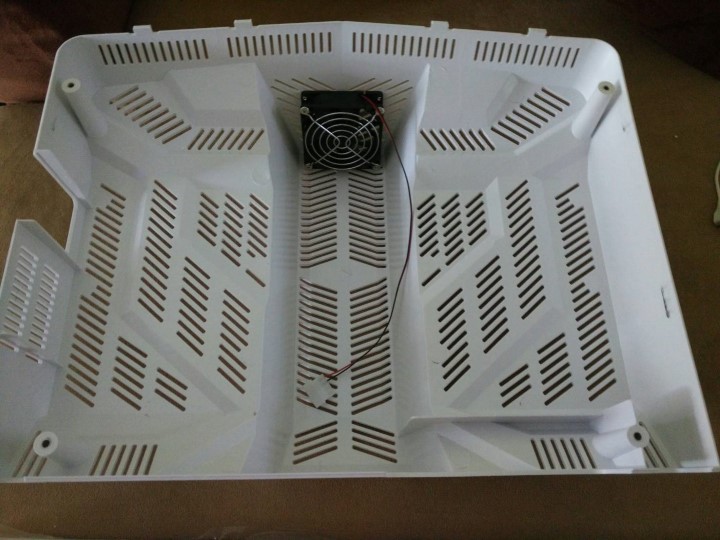
- ตรงฝาครอบด้านบนจะมีพัดลมระบายความร้อนขนาด 8cm ติดมาให้ 1 ตัว


การประกอบก็เหมือนประกอบคอมพิวเตอร์ทั่ว ๆ ไป  ไม่มีอะไรแตกต่าง

ข้อจำกัดคือ
- ขนาดความสูงของพัดลม CPU ไม่เกิน 6cm
- ขนาดความยาวของ Graphic Card ไม่เกิน 32cm
- ขนาดของ Power Supply ไม่เกิน 16cm x 15cm x 8.5cm
- ขนาดของ M/B แบบ microATX ไม่เกิน 24cm x 24cm

การประกอบก็ไม่มีอะไรพิเศษ มีเพียงเพิ่มเรื่องการต่อสาย power ให้กับจอ และต่อสาย DVI เข้าไป


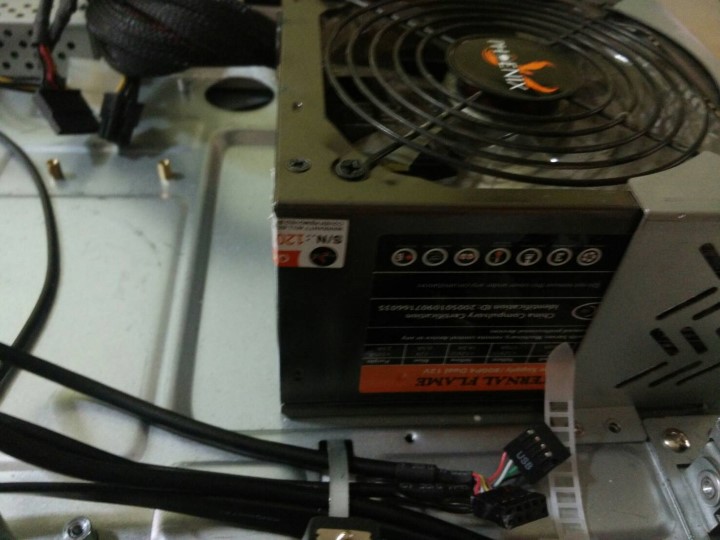
ในรูปเป็น power ขนาดมาตรฐาน 14cm x 15cm x 8.5cm   จะเห็นว่ามีพื้นที่เหลืออยู่อีก ซึ่งสามารถใช้

power supply ได้ขนาดถึง 16cm x 15cm x 8.5cm ทำให้เลือกใช้ได้หลายรุ่นมากขึ้น


เมื่อทำการประกอบเรียบร้อย ก็ทำการเปิดเครื่อง โดยกดปุ่ม Power บนตัวจอ ก็จะทำการเปิดเครื่องพร้อมจอทันที


สวยงามตามท้องเรื่อง

18
สินค้าและบริการ / All In One PC แบบ DIY
« เมื่อ: 10 สิงหาคม 2016, 04:53:49 »


- รุ่น H27

ขนาดของตัวจอ ไม่รวมฐาน  สูง 42 cm  ยาว 65 cm  

ความหนาวัดจากหน้าจอไปยังส่วนที่หน้าที่สุด ประมาณ 16 cm

รองรับ M/B แบบ MicroATX ทั่วไป (รองรับถึงขนาด ATX)

ขนาด Power Supply ขนาดมาตรฐาน 14cm x 15cm

รองรับการเชื่อมต่อแบบ DVI/VGA

อุปกรณ์เสริมอื่น ๆ มีกล้อง webcam/speaker มาในตัว รองรับ cdrom แบบ slim

ปุ่มควบคุม 4 ปุ่ม   Menu / +up / -down / Power

ข้อสังเกตุ : ไม่มี usb / ไม่มีที่แขวนหูฟัง

มี 3 ขนาดให้เลือก 24 นิ้ว 27 นิ้ว และ 32 นิ้ว


- รุ่น V27

ขนาดของตัวจอ ไม่รวมฐาน  สูง 42 cm  ยาว 65 cm  

ความหนาวัดจากหน้าจอไปยังส่วนที่หน้าที่สุด ประมาณ 17 cm

รองรับ M/B แบบ MicroATX ทั่วไป

ขนาด Power Supply ขนาดมาตรฐาน 14cm x 15cm

รองรับการเชื่อมต่อแบบ DVI

อุปกรณ์เสริมอื่น ๆ มี usb 2.0 มา 2 port

ปุ่มควบคุม 4 ปุ่ม   Menu / +up / -down / Power

ข้อสังเกตุ : ไม่มี webcam / ไม่มีที่แขวนหูฟัง / มีรุ่นความละเอียด 2K ให้เลือก

มี 3 ขนาดให้เลือก 24 นิ้ว 27 นิ้ว และ 32 นิ้ว


- รุ่น N27

ขนาดของตัวจอ ไม่รวมฐาน  สูง 42 cm  ยาว 65 cm  

ความหนาวัดจากหน้าจอไปยังส่วนที่หน้าที่สุด ประมาณ 17 cm

รองรับ M/B แบบ MicroATX ทั่วไป

ขนาด Power Supply ขนาดมาตรฐาน 18cm x 15cm

รองรับการเชื่อมต่อแบบ DVI

อุปกรณ์เสริมอื่น ๆ มี usb 3.0 1 port / usb 2.0 1 Port / Speaker / Mic   และมีที่แขวนหูฟัง

ปุ่มควบคุม 3 ปุ่ม   Menu / +up / -down  มีปุ่ม Power แยกต่างหากแสดงไฟสว่างขณะใช้งาน

ข้อสังเกตุ : ไม่มี webcam  ขาจอสามารถยึดติดกับพื้นโต๊ะได้

มี 2 ขนาด คือ 27 นิ้ว และ 32 นิ้ว

23
สินค้าและบริการ / Network Server PRO
« เมื่อ: 11 มีนาคม 2016, 00:02:26 »
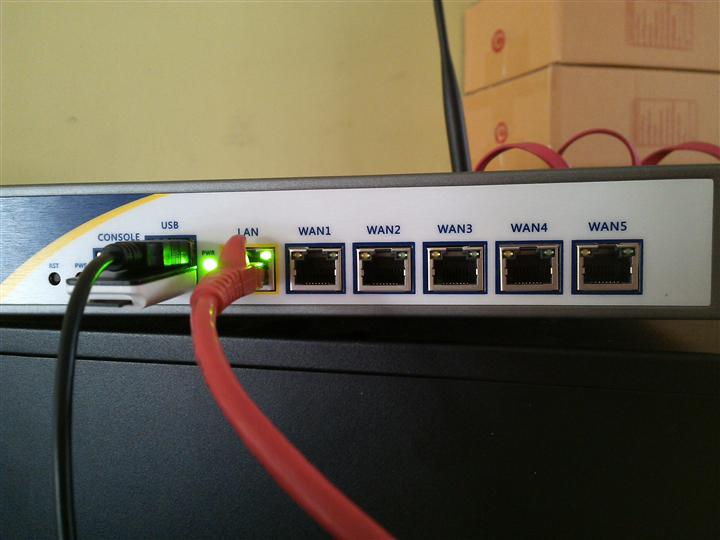
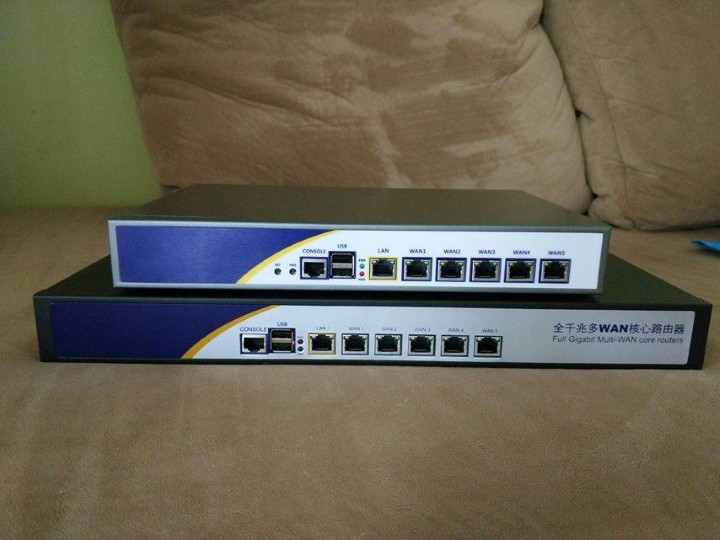
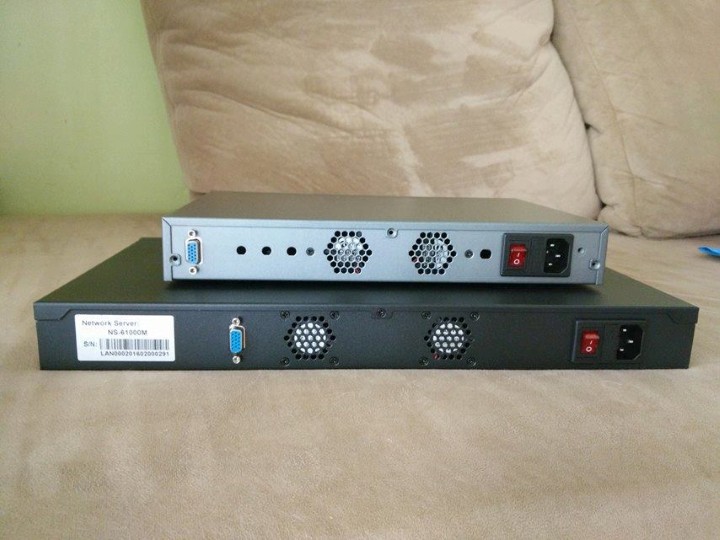
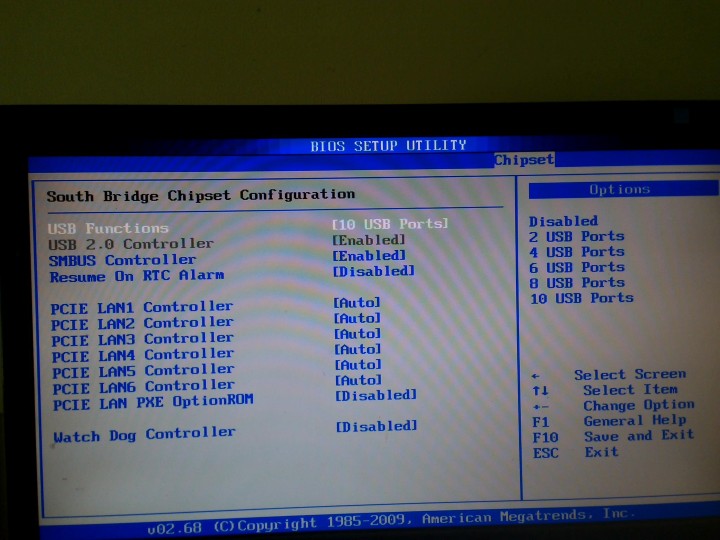
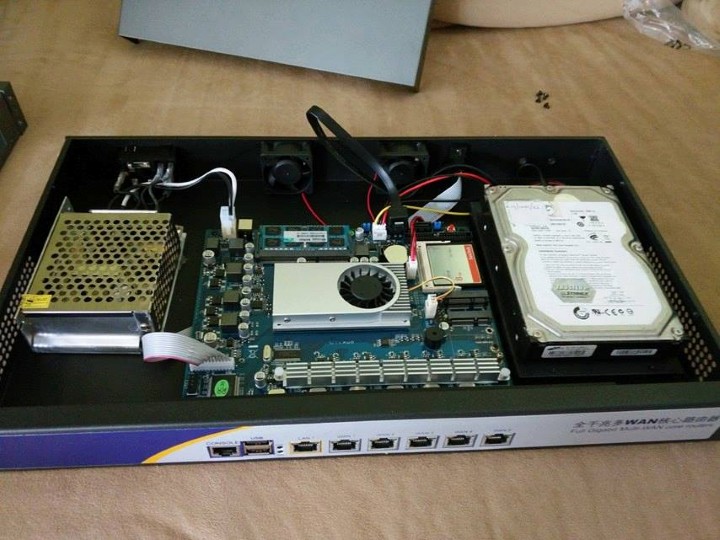
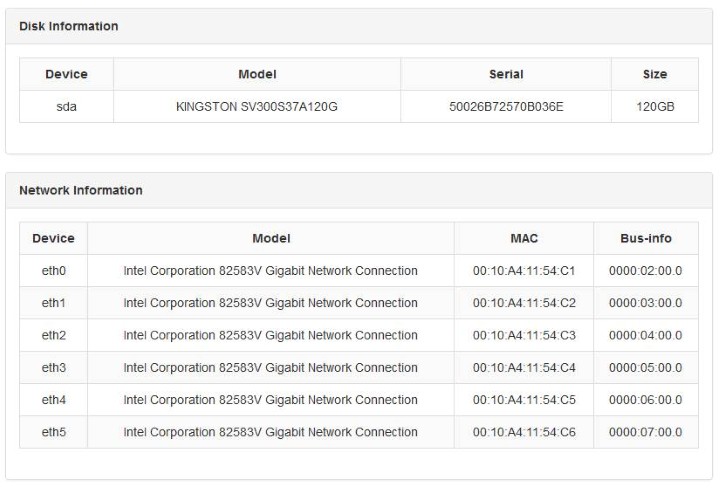
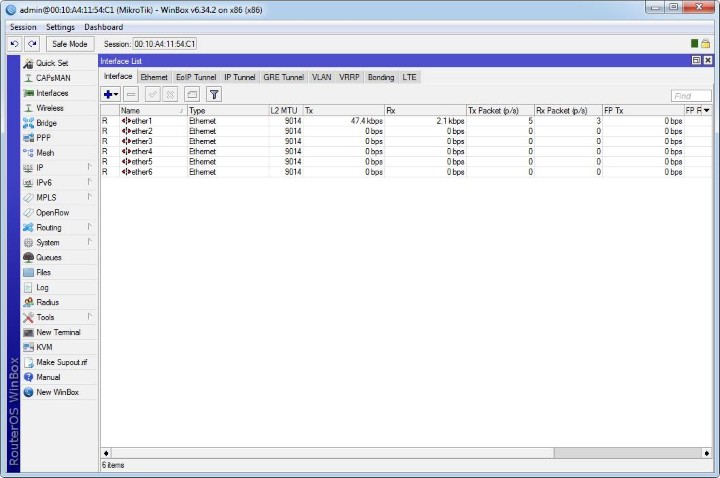
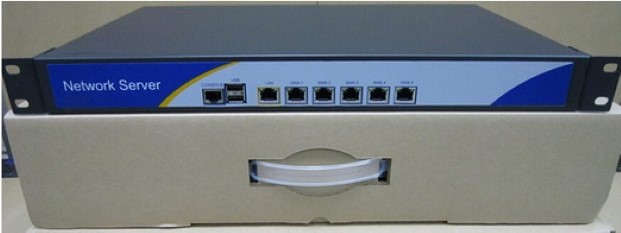
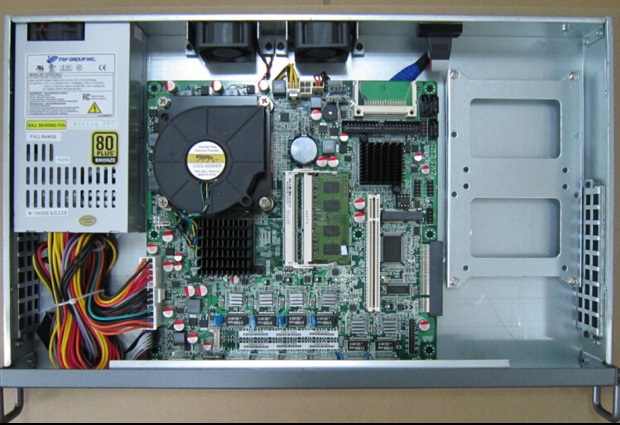
Network Server ขนาด 6 Gigabit LAN แบบ Rack 1U


24
สินค้าและบริการ / Network Server
« เมื่อ: 02 มีนาคม 2016, 04:57:27 »
พบกับสินค้าใหม่ จากทาง Hadyai Internet


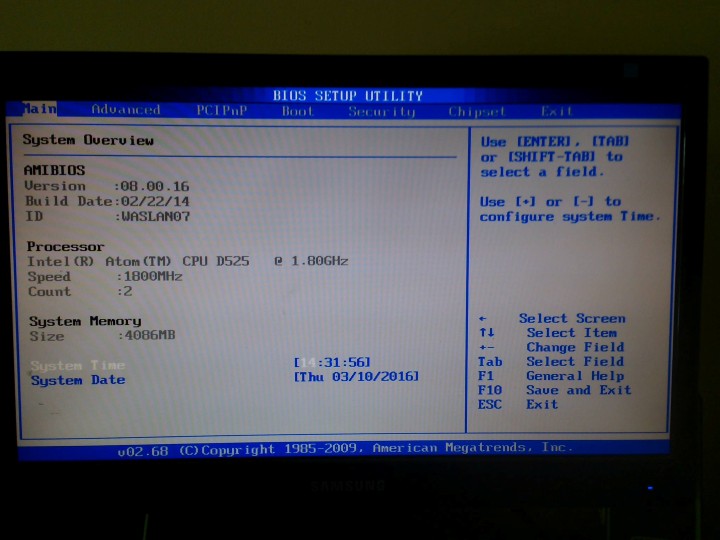
รองรับ Ubuntu, Mikrotik, ClearOs, pfSense, IPFire เป็นต้น

Coming Soon.

25
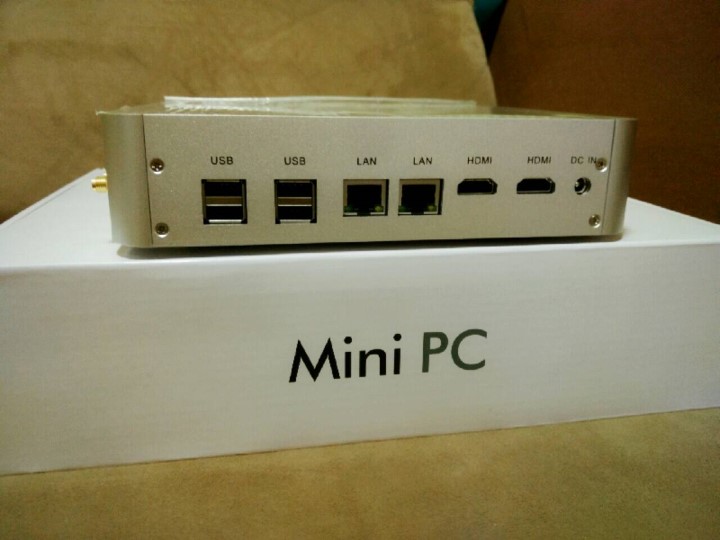
สินค้าและบริการ / mini PC
« เมื่อ: 24 กุมภาพันธ์ 2016, 05:39:23 »


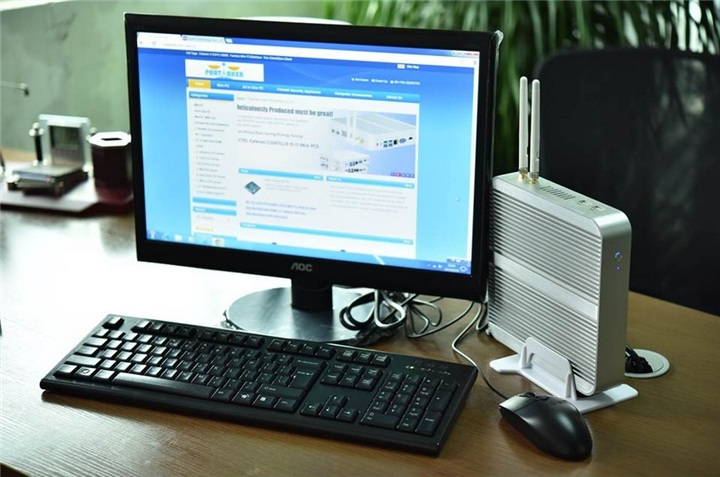
มินิพีซี  เครื่องพีซีขนาดเล็ก  ประสิทธิสูงเทียบเท่า pc ขนาดใหญ่ ประหยัดไฟ ประหยัดพื้นที่

เคลื่อนย้าย พกพา ได้สะดวก ดูทันสมัยน่าใช้งาน รองรับ win7 / win8.1 / win10 และ linux

รุ่น Basic


spec

- cpu intel N3150 (4 core 4 thread) / cpu intel i5-4200Y (2 core 4 thread)
- RAM 1 slot DDR3L-1600 Max 8GB
- 1 x SATA3 6Gbps  HDD/SSD Notebook
- 1 x mSATA 6Gbps  SSD
- 1 x PCIe wifi  b/g/n 300Mbps
- 4 x USB3.0
- 2 x USB2.0
- Aluminium Case ขนาด 160x120x37 mm.
- Power Adapter 12V 3A

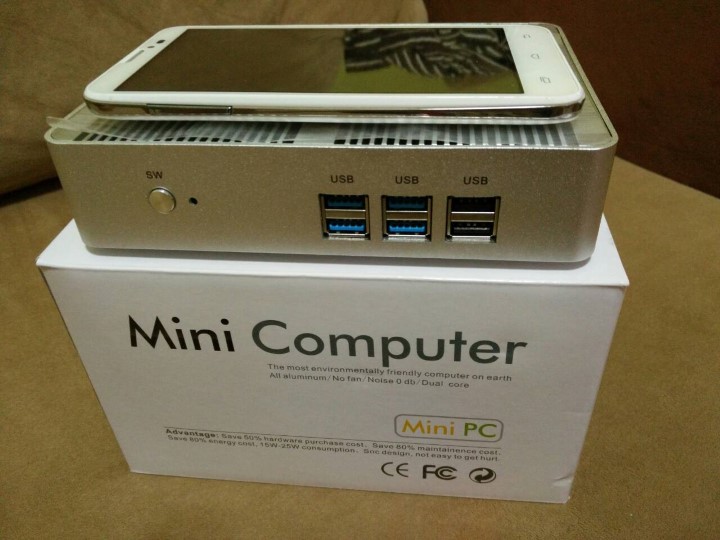
ด้านหน้า


มี Power Switch   USB3.0  4 Port   USB2.0  2 Port

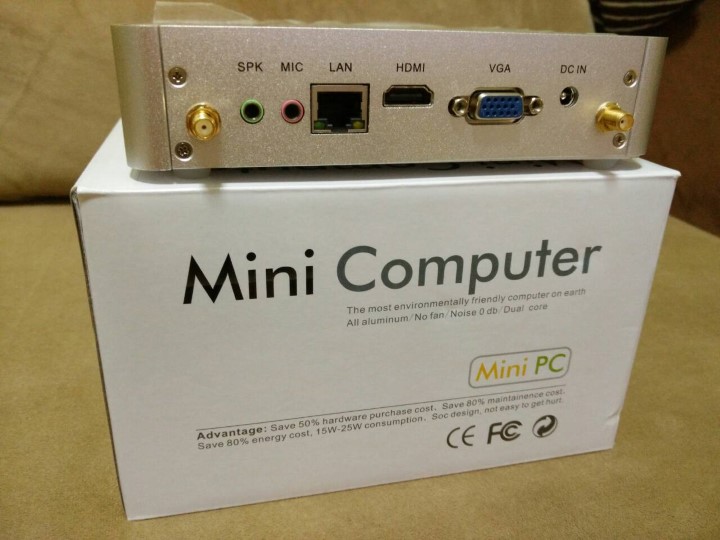
ด้านหลัง  มีให้เลือก 2 แบบ

แบบแรก


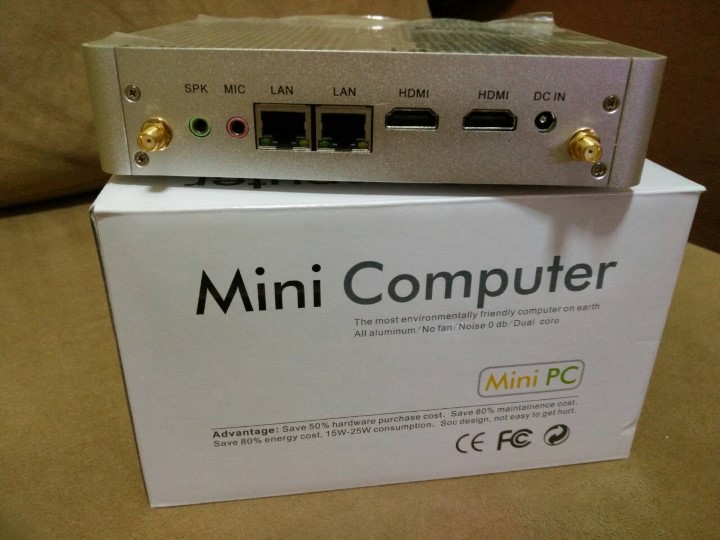
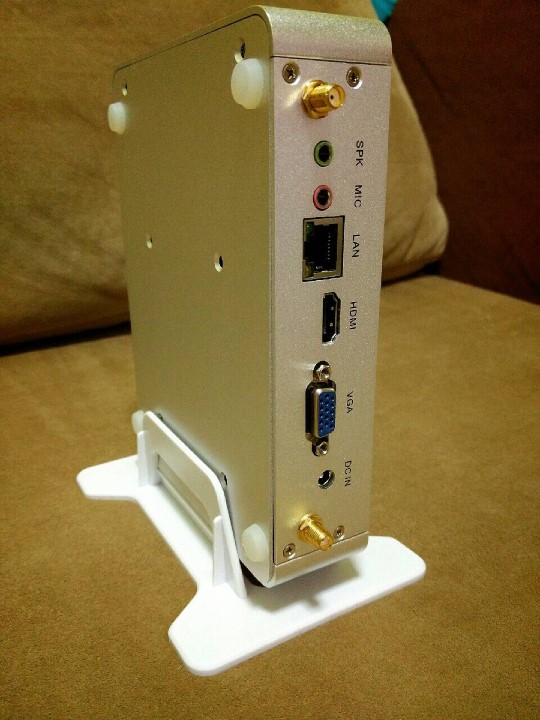
มีเสาสองต้น  Speaker / Mic / LAN / HDMI / VGA / DC-IN

แบบที่สอง


มีเสาสองต้น  Speaker / Mic / LAN / LAN / HDMI / HDMI / DC-IN

ตัวเคสจะเป็นอลูมิเนียม สำหรับระบายความร้อน และมีฐานสำหรับวางในแนวตั้งได้ เพื่อการระบายความร้อนที่ดีขึ้น


รุ่น Basic เป็นรุ่นพื้นฐานสำหรับ PC ซึ่งมีมาให้ครบแล้ว สามารถเลือกได้ว่าจะใช้เป็น Celeron N3150 Gen5

หรือเป็น Core i5 4200Y ในราคาที่คุ้มค่า


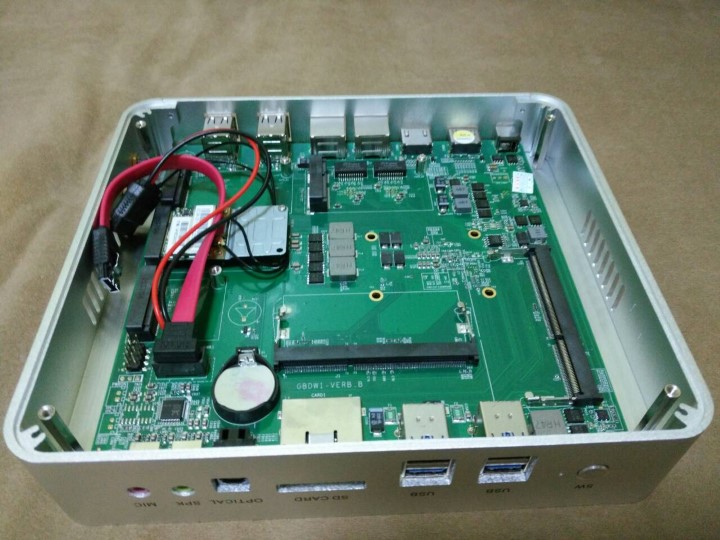
ต่อไปเป็นรุ่น Pro ซึ่งจะเป็นรุ่นที่สเปคสูงขึ้น สามารถอัพเกรดได้มากขึ้น


spec

-  i5 4258U, i5 5200U, i5 5250U, i5 5257U , i7 5650U
- RAM 2 slot DDR3L-1600 Max 16GB
- 1 x SATA3 6Gbps  HDD/SSD Notebook
- 2 x mSATA 6Gbps  SSD
- 1 x PCIe wifi  b/g/n 300Mbps
- 4 x USB3.0
- 4 x USB2.0
- Aluminium Case ขนาด 210x170x45 mm.
- Power Adapter 12V 5A

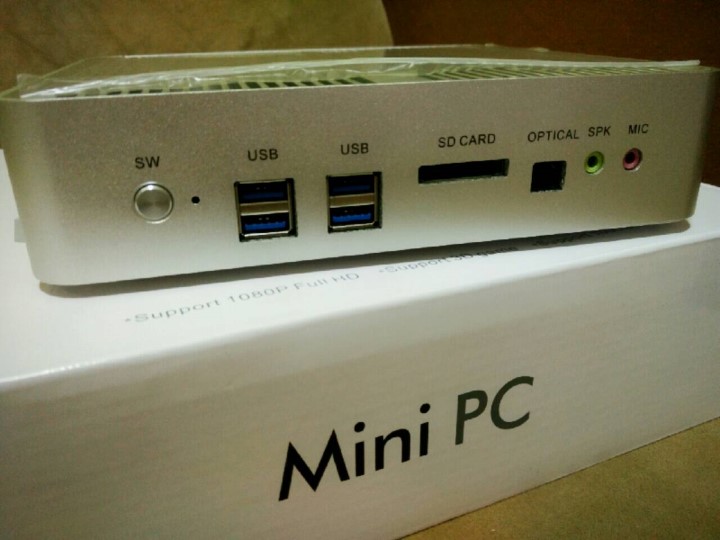
ด้านหน้า


ประกอบด้วย Power Switch / USB3.0 4 Port / SD Card / Optical / Speaker / MIC

ด้านหลัง


ประกอบด้วย USB2.0  4 Port / LAN / LAN / HDMI / HDMI / DC-IN

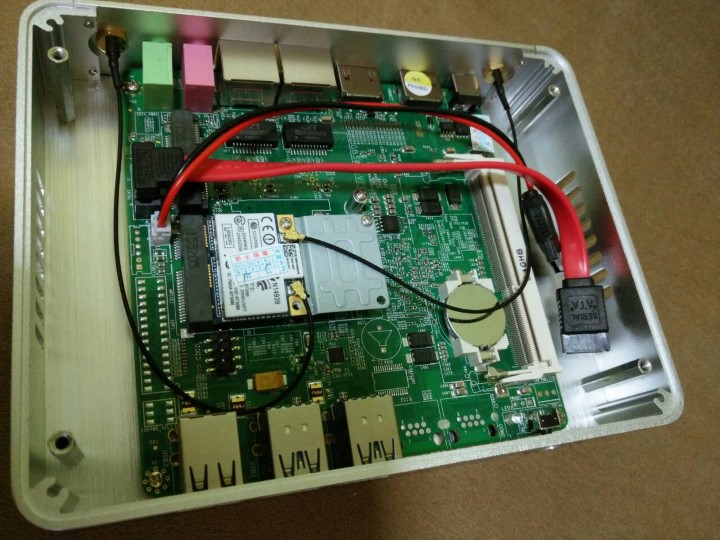
ส่วนตัวบอร์ด ก็จะมีขนาดใหญ่ รองรับการอัพเกรดได้มากขึ้น

มี cpu ให้เลือกหลายแบบ ตามความต้องการ

26
Linux Server System / Re: Traffic Control HOWTO
« เมื่อ: 08 กุมภาพันธ์ 2016, 02:56:44 »
hfsc  ตัวอย่าง

#!/bin/bash
# encoding: UTF-8
#
# HFSC helper script
# (c) 2006-2011 Maciej Bliziński
# http://automatthias.wordpress.com/
#
#   This program is free software: you can redistribute it and/or modify
#   it under the terms of the GNU General Public License as published by
#   the Free Software Foundation, version 3 of the License.
#
#   This program is distributed in the hope that it will be useful,
#   but WITHOUT ANY WARRANTY; without even the implied warranty of
#   MERCHANTABILITY or FITNESS FOR A PARTICULAR PURPOSE.  See the
#   GNU General Public License for more details.
#
#   You should have received a copy of the GNU General Public License
#   along with this program.  If not, see <http://www.gnu.org/licenses/>.
#
#
# References:
# - Original shell script:
#   http://www.voip-info.org/wiki/view/QoS+Linux+with+HFSC
# - Kernel configuration (probably not necessary on modern distros)
#   http://www.nslu2-linux.org/wiki/HowTo/EnableTrafficShaping
# - Hierarchical Packet Schedulers presentation
#   http://www.cs.cmu.edu/~hzhang/HFSC/main.html
# - HFSC Scheduling with Linux
#   http://linux-ip.net/articles/hfsc.en/
#
# When specifying parameters of your xDSL, provide values slightly lower
# than the nominal ones.
# For example, my line is 256/128, so I specify 240/100.

# Uplink and downlink speeds
DOWNLINK=$3
UPLINK=$4

# Device that connects you to the Internet
DEV=$2

# Action to be performed
ACTION=$1

# IP addresses of the VoIP phones,
# if none, set VOIPIPS=""
VOIPIPS=""

# Interactive class: SSH Terminal, DNS and gaming (Quake)
INTERACTIVEPORTS="22 23 53 3389 5900"

# VoIP telephony
VOIPPORTS="5060:5100 10000:11000 5000:5059 8000:8016 5004 1720 1731 8080 443"
#VOIPPORTS=""

# WWW, jabber and IRC
BROWSINGPORTS="80"

# The lowest priority traffic: eDonkey, Bittorrent, etc.
P2PPORTS="110 25 21 143 445 137:139 4662 4664 6881:6999"

########################################################################
# Configuration ends here
########################################################################

function check_device() {
        if [ -z "$DEV" ] ; then
                echo "$0: stop requires a device, aborting."
                exit -1
        fi
}

case "$ACTION" in
status)
        check_device

        echo "[qdisc]"
        tc -s qdisc show dev $DEV

        echo ""
        echo "[class]"
        tc -s class show dev $DEV

        echo ""
        echo "[filter]"
        tc -s filter show dev $DEV

        echo ""
        echo "[iptables]"
        iptables -t mangle -L THESHAPER -v -x 2> /dev/null
        exit
        ;;

stop)
        check_device
        # Reset everything to a known state (cleared)
        tc qdisc del dev $DEV root    > /dev/null 2>&1
        tc qdisc del dev $DEV ingress > /dev/null 2>&1

        # Flush and delete tables
        iptables -t mangle --delete POSTROUTING -o $DEV -j THESHAPER > /dev/null 2>&1
        iptables -t mangle --flush        THESHAPER 2> /dev/null > /dev/null
        iptables -t mangle --delete-chain THESHAPER 2> /dev/null > /dev/null
        echo "Shaping removed on $DEV."
        exit
        ;;
start)
        check_device
        if [ -z "$DOWNLINK" ] ; then
                echo "$0: start requires a downlink speed, aborting."
                exit -1
        fi
        if [ -z "$UPLINK" ] ; then
                echo "$0: start requires an uplink speed, aborting."
                exit -1
        fi

        # Traffic classes:
        # 1:2 Interactive (SSH, DNS, ACK, Quake)
        # 1:3 Low latency (VoIP)
        # 1:4 Browsing (HTTP, HTTPs)
        # 1:5 Default
        # 1:6 Low priority (p2p, pop3, smtp, etc)

        # add HFSC root qdisc
        tc qdisc add dev $DEV root handle 1: hfsc default 5

        # add main rate limit class
        tc class add dev $DEV parent 1: classid 1:1 hfsc \
                sc rate ${UPLINK}kbit ul rate ${UPLINK}kbit

        # Interactive traffic: guarantee realtime full uplink for 50ms, then
        # 5/10 of the uplink

        tc class add dev $DEV parent 1:1  classid 1:2 hfsc \
                rt m1   ${UPLINK}kbit d  50ms m2 $((5*$UPLINK/10))kbit \
                ls m1   ${UPLINK}kbit d  50ms m2 $((7*$UPLINK/10))kbit \
                ul rate ${UPLINK}kbit

        # VoIP: guarantee full uplink for 200ms, then 3/10
        tc class add dev $DEV parent 1:1  classid 1:3 hfsc \
                sc m1 ${UPLINK}kbit d 200ms m2 $((3*$UPLINK/10))kbit \
                ul rate ${UPLINK}kbit

        # Browsing: Don't guarantee anything for the first second, then
        # guarantee 1/10

        tc class add dev $DEV parent 1:1  classid 1:4 hfsc \
                sc m1         0 d    1s m2 $((1*$UPLINK/10))kbit \
                ul rate ${UPLINK}kbit

        # Default traffic: don't guarantee anything for the first two seconds,
        # then guarantee 1/20

        tc class add dev $DEV parent 1:1  classid 1:5 hfsc \
                sc m1         0 d    2s m2 $((1*$UPLINK/20))kbit \
                ul rate ${UPLINK}kbit

        # Default traffic: don't guarantee anything for the first 10 seconds,
        # then guarantee 1/20

        tc class add dev $DEV parent 1:1  classid 1:6 hfsc \
                sc m1         0 d   10s m2 $((1*$UPLINK/20))kbit \
                ul rate ${UPLINK}kbit

        # add THESHAPER chain to the mangle table in iptables

        iptables -t mangle --new-chain THESHAPER
        iptables -t mangle --insert POSTROUTING -o $DEV -j THESHAPER

        # To speed up downloads while an upload is going on, put short ACK
        # packets in the interactive class:

        iptables -t mangle -A THESHAPER \
                -p tcp \
                -m tcp --tcp-flags FIN,SYN,RST,ACK ACK \
                -m length --length :64 \
                -j CLASSIFY --set-class 1:2

        # put large (512+) icmp packets in browsing category
        iptables -t mangle -A THESHAPER \
                -p icmp \
                -m length --length 512: \
                -j CLASSIFY --set-class 1:4

        # ICMP (ip protocol 1) in the interactive class
        iptables -t mangle -A THESHAPER \
                -p icmp  \
                -m length --length :512 \
                -j CLASSIFY --set-class 1:2

        setclassbyport() {
                port=$1
                CLASS=$2
                iptables -t mangle -A THESHAPER -p udp --sport $port -j CLASSIFY --set-class $CLASS
                iptables -t mangle -A THESHAPER -p udp --dport $port -j CLASSIFY --set-class $CLASS
                iptables -t mangle -A THESHAPER -p tcp --sport $port -j CLASSIFY --set-class $CLASS
                iptables -t mangle -A THESHAPER -p tcp --dport $port -j CLASSIFY --set-class $CLASS
        }

        for port in $INTERACTIVEPORTS;  do setclassbyport $port 1:2; done
        for port in $VOIPPORTS;         do setclassbyport $port 1:3; done
        for port in $BROWSINGPORTS;     do setclassbyport $port 1:4; done
        for port in $P2PPORTS;          do setclassbyport $port 1:6; done

        for VOIP in $VOIPIPS
        do
                iptables -t mangle -A THESHAPER --src $VOIP -j CLASSIFY --set-class 1:3
                iptables -t mangle -A THESHAPER --dst $VOIP -j CLASSIFY --set-class 1:3
        done

        # Try to control the incoming traffic as well.
        # Set up ingress qdisc
        tc qdisc add dev $DEV handle ffff: ingress

        # Filter everything that is coming in too fast
        # It's mostly HTTP downloads that keep jamming the downlink, so try to restrict
        # them to 6/10 of the downlink.
        tc filter add dev $DEV parent ffff: protocol ip prio 50 \
           u32 match ip src 0.0.0.0/0 \
           match ip protocol 6 0xff \
           match ip sport 80 0xffff \
           police rate $((6*${DOWNLINK}/10))kbit \
           burst 10k drop flowid :1

        tc filter add dev $DEV parent ffff: protocol ip prio 50 \
           u32 match ip src 0.0.0.0/0 \
           match ip protocol 6 0xff \
           match ip dport 80 0xffff \
           police rate $((6*${DOWNLINK}/10))kbit \
           burst 10k drop flowid :1
        ;;
*)
        echo "$0 [ACTION] [device]"
        echo "ACTION := { start [downlink] [uplink] | stop | status }"
        exit
        ;;
esac
27
Linux Server System / Re: Traffic Control HOWTO
« เมื่อ: 07 กุมภาพันธ์ 2016, 18:12:51 »
PCQ with IFB

#!/bin/bash

# This scripts control incomming and outcomming bandwight in a linux router box
# The linux box only have one eth0 connect to the local network and other to internet
#  ifb0 is a a special device create only for limit the incomming bandwight in eth0
# It is configured for match a 192.168.1.0/24 network, with 255 hosts

# The limit for up/down is 20Mb (36000kbit), divide this bandwight for every host (in this case 80kbit)

# Interface connect to out lan
int1="eth0.105"
# Interface virtual for incomming traffic
tin1="ifb0"
# Lan address (without netmask part)
lan1="192.168.200."
dl=20
ul=2

mb=1048570
download=$(echo "$dl * $mb" | bc | cut -d . -f 1)
upload=$(echo "$ul * $mb" | bc | cut -d . -f 1)

# It's necessary load this module in the kernel for do it
modprobe ifb numifbs=1
ip link set dev $tin1 up


## Limit outcomming traffic (to internet)
# Clean interface
tc qdisc del root dev $int1  > /dev/null 2>&1
# Add classes per ip
tc qdisc add dev $int1 root handle 1: htb default 20
        tc class add dev $int1 parent 1: classid 1:1 htb rate ${download}bit
                for i in $(seq 100 150); do
                        tc class add dev $int1 parent 1:1 classid 1:1$i htb rate 140kbit ceil ${download}bit
                done
# Match ip and put it into the respective class
for i in $(seq 100 150); do
        tc filter add dev $int1 protocol ip parent 1: prio 1 u32 match ip dst $lan1$i/32 flowid 1:1$i
done


## Limit incomming traffic ( to localhost)
# Clean interface
tc qdisc del dev $int1 handle ffff: ingress  > /dev/null 2>&1
tc qdisc del root dev $tin1  > /dev/null 2>&1
tc qdisc add dev $int1 handle ffff: ingress
# Redirecto ingress eth0 to egress ifb0
tc filter add dev $int1 parent ffff: protocol ip u32 match u32 0 0 action mirred egress redirect dev $tin1
# Add classes per ip
tc qdisc add dev $tin1 root handle 2: htb default 20
        tc class add dev $tin1 parent 2: classid 2:1 htb rate ${upload}bit
                for i in $(seq 100 150); do
                        tc class add dev $tin1 parent 2:1 classid 2:1$i htb rate 14kbit ceil ${upload}bit
                done

# Match ip and put it into the respective class
for i in $(seq 100 150); do
        tc filter add dev $tin1 protocol ip parent 2: prio 1 u32 match ip src $lan1$i/32 flowid 2:1$i
done

29
สินค้าและบริการ / mini server/pc
« เมื่อ: 31 มกราคม 2016, 18:32:17 »
รุ่น Celeron

[youtube]DNV68ko7rtI[/youtube]

รุ่น Core i5

[youtube]H87pnLZ4bQ0[/youtube]

ทดสอบเล่นเกมส์  รุ่น  i5 5257U

[youtube]JE_jdpfeb70[/youtube]

Coming Soon...

30
ขั้นตอนการติดตั้ง

- ทำการติดตั้ง package ที่ต้องใช้งาน
#apt-get install xtables-addons-common libtext-csv-xs-perl unzip

- สร้าง folder สำหรับเก็บฐานข้อมูล
#mkdir /usr/share/xt_geoip

- ทำการ download ฐานข้อมูลล่าสุด
#/usr/lib/xtables-addons/xt_geoip_dl

- ทำการแปลงฐานข้อมูล
#/usr/lib/xtables-addons/xt_geoip_build -D /usr/share/xt_geoip *.csv

เป็นอันเรียบร้อย

สามารถทดสอบได้โดย

#iptables -m geoip --help

ถ้าไม่มี error ก็แสดงว่าสำเร็จ

-สำหรับการ mark ก็ใช้เป็น

#iptables -A PREROUTING -t mangle -m geoip --dst-cc TH -j domestic-route
#iptables -A PREROUTING -t mangle -m geoip ! --dst-cc TH -j international-route

เป็นต้น

หน้า: 1 [2] 3 4 ... 115